
Dandelion wine recipe has been something I’ve wanted to create for a long time; however, good intentions frequently were swept away by the numerous tasks that spring brings. Since we’ll age the wine for two years, I would like, more significant than any time, that we could have begun making it years ago, when I first became enthralled by the concept. However, it’s better to be late than never!
Must Read: Best Strawberry Smoothie Recipes Without Yogurt
Dandelion Wine Recipe – Ingredients
This recipe will make more than 5 gallons of dandelion wine. This size is deliberate – it’s designed to ferment in a large 5-6 gallon carboy which are readily available from wine and home-brew suppliers. This will yield about 24 bottles of wine.
If you want to make a 1-gallon version (which will ferment in a easy-to-find 1-gallon jug and bottle in 4-5 wine bottles by adjusting water at the end), just divide it by 4; I wouldn’t make less than that though it’s likely possible.
Also note the chlorine/ chloramine-free water is needed in order for fermentation to occur. If your city water adds chlorine, you can boil it or let it sit in a bowl overnight to remove the chlorine. Chloramine cannot be removed and, if your city uses it, you’ll need to use purified, spring or bottled water. This is true for all ferments.
Stage 10 of the recipe calls for fermenting in an air-tight environment. Here’s a few notes on what that means:
- You could use a carboy or fermenting vessel but there often prove difficult to clean when the pot is still full of petals and fruit. These are sealed off with airlocks to remove the air.
- You could use a regular fermenting crock and cover with plastic wrap. This isn’t perfect as it won’t allow air to escape. This isn’t a total obstacle because:
- I like to stir my ferment every day or two. Of course this means that I’m not really fermenting in an air-free environment since I’m actively adding air into the mix. You don’t have to stir it, but I do (I also taste and listen for bubbles/ fermenting when I do so).
- The best air-free fermenting vessel, in my mind, is the Harsch Gartopf crocks. They are extremely expensive but their dual-rim allows the perfect conditions to allow air out of the container but not to come back in.
Dandelion Wine Recipe – Ingredients
- 4-5 quarts (liters) dandelion petals (remove as much of the green as possible). Here’s a trick for separating dandelion petals from the flower.
- Water (4-5 times the volume of dandelion petals)
- 4 oranges, sliced
- 1 lemon, sliced
- 32 cups sugar (sugar is essential in creating alcohol like this)
- 1 ounce (4 packages) active dry yeast
Also See: Homemade & Healthy Coffee Creamers
Dandelion Wine Recipe – Instructions
- As long as you are making 1 gallon of wine or more, boil 1-gallon of water
- Place dandelion petals in a large crock/ fermenting pot. Use a LARGE container – we used a 15 liter (approximately 3 gallon) crock and I wish I had even bigger)!
- Cover petals with boiling water, stir.
- Cover pot with a loose-fitting lid, towel or cloth.
- Leave in a warm place, stir a few times a day for the next 4 days.
- Mix yeast with warm water in a bowl and leave on counter. When the yeast begins to bubble you can add it to the crock (this should take 5-20 minutes in a warm spot in your kitchen)
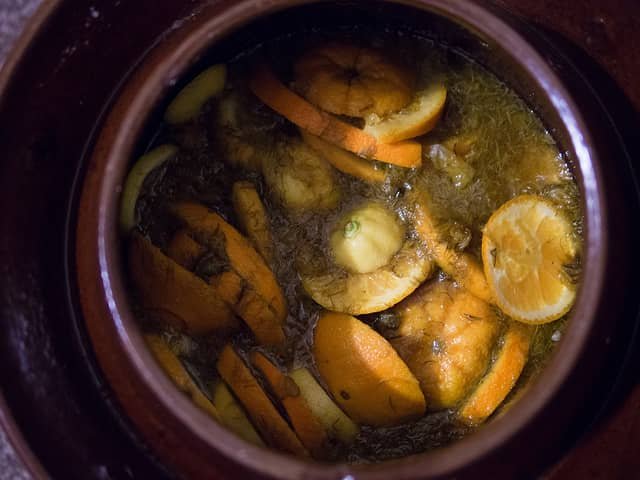
- Add the citrus pieces (squeezing the juice into the crock).
- Add sugar to the crock, stirring often to mix well.
- Add more water to the crock to raise the level of the broth near the top of the crock (it will expand as the ferment will cause air pockets in the petals so leave room for it to expand). Use as much water as you can. ESSENTIAL: MEASURE THE AMOUNT OF WATER YOU’VE ADDED AND WRITE THIS DOWN.
- Ferment in an air-tight environment for 10-20 days. Read the notes in the opening paragraph about air-tight environments if you haven’t already (I also mention that I stir the ferment every few days). This will happen faster in warmer environments and slower in colder ones.
- Once the mixture stops bubbling, strain it (I use multiple strainers with different sized holes to speed this up). Squeeze every bit of liquid you can from anything that’s solid in your strainer.
- Pour into a carboy, add remaining water (subtract the first gallon plus whatever you added in stage 9 from total water needed). Allow sentiment to settle.
- Rack the wine (removing the liquid without the sentiment).
- Bulk age for 6-12 months before bottling.
- After bottling, the taste will improve for years – many wait at least 2-3 years before consuming.
If racking and bulk ageing are new concepts to you, we’ll post articles on how to do each soon (and add links here to help you out); we just need for our ferment to get to those points so we can take some photos of the process.


